Spider Chocolate Chip Cookies: The Spookiest, Chewiest Halloween Treat 🕷️
The Secret Ingredient for a Spooky Celebration: Spider Chocolate Chip Cookies
Halloween isn’t just about costumes; it’s about fun, festive treats! And while the classic chocolate chip cookie is unbeatable, giving it a spooky, cute makeover is what makes this Spider Chocolate Chip Cookies recipe an absolute must-bake this season.
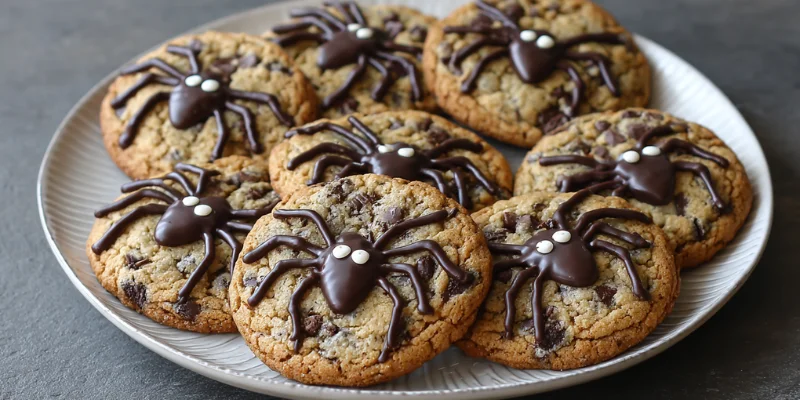
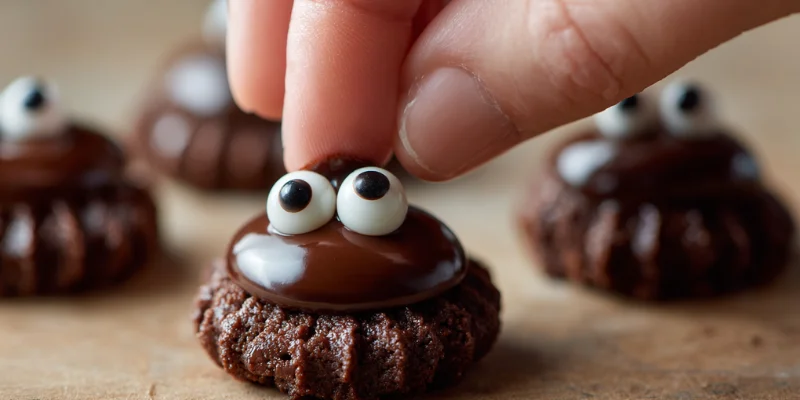
Imagine the perfect cookie: golden edges, a soft, chewy center, and pools of melted chocolate. Now, imagine that cookie is topped with a rich, fudgey “spider”—that’s what we’re creating here! This recipe uses a reliable base that bakes up beautifully every time, making it easy to focus on the fun, decorative part.
This recipe is simple, comforting, and perfect for baking with the whole family. If you’ve been busy making savory, slow-cooked meals this week, like a batch of rich Slow Cooker Homemade Tomato Sauce
to stock your freezer, then it’s time to reward yourself with an easy, celebratory dessert! And for those holiday meals that need a decadent sauce, don’t forget the umami kick of my Savory Caramelized Shallot Bacon Gravy.
Why You’ll Love This Recipe
Preparation and Cooking Time
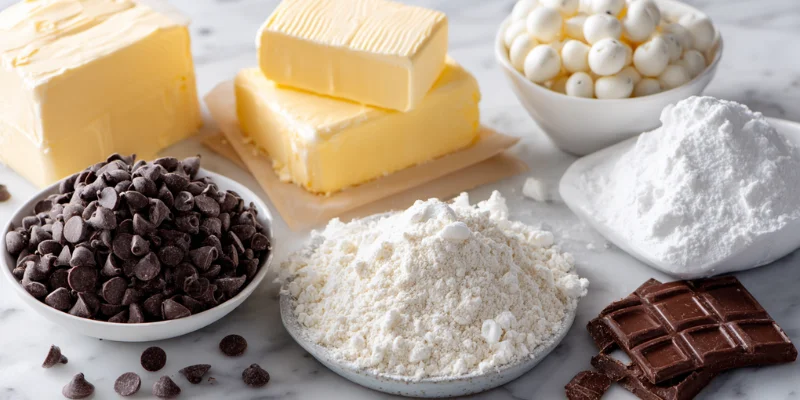
Ingredients
Simple pantry favorites, plus a few special touches:
Cookie Dough
Spider Topping & Decoration
Ingredient Notes & Substitutions

Step-by-Step Instructions
Step 1: Prepare Dough
In a medium bowl, whisk together the flour, baking soda, and salt. Set aside. In a large bowl or stand mixer, cream together the softened butter, granulated sugar, and brown sugar until light and fluffy (about 3 minutes). Beat in the vanilla and eggs one at a time, mixing well after each addition.
Step 2: Combine and Chill
Gradually add the dry ingredients to the wet ingredients, mixing on low speed until just combined. Fold in the chocolate chips. Tip: Chilling the dough for 30 minutes is highly recommended to prevent the cookies from spreading too thin.
Step 3: Bake the Cookies
Preheat oven to 375∘F (190∘C). Scoop 1.5-inch balls of dough onto a parchment-lined baking sheet. Bake for 10–12 minutes until the edges are golden brown and the centers still look slightly soft. Let cool on the baking sheet for 5 minutes before transferring to a wire rack to cool completely.
Step 4: Melt the Chocolate (for Spiders)
In a small microwave-safe bowl, combine the 1 cup of chocolate chips and coconut oil/butter (if using). Microwave in 30-second intervals, stirring between each, until completely smooth. Transfer the melted chocolate to a piping bag or a small Ziploc bag with a tiny corner snipped off.
Step 5: Decorate the Spiders
On each cooled cookie, pipe a small, thick dollop of melted chocolate in the center to form the spider’s body. While the chocolate is still wet, gently press two candy eyeballs onto the dollop. Allow the “body” to set for a minute.
Step 6: Pipe the Legs
Using the same piping bag, carefully pipe four small, slightly curved legs extending out from each side of the spider’s body. Let the chocolate set completely before serving or storing.
Nutrition Information Table (Estimated)
Based on an estimated 1 medium cookie (without toppings).
| Nutrient | Amount |
| Calories | 195 kcal |
| Protein | 2 g |
| Carbs | 24 g |
| Fat | 10 g |
| Fiber | 1 g |
Cozy Kitchen Moment
Craving more comforting dinners with a twist?
Try my Savory Caramelized Shallot Bacon Gravy for that sweet-heat crunch or indulge in dessert with Strawberry Cheesecake Cookies.
Pro Tips for Success
How to Serve
These fun, spooky cookies are the perfect addition to any fall gathering or dessert table.

Recipe Variations
Storage & Reheating
Fridge
Freezer:
Note: Decorated cookies (with melted chocolate) should not be frozen, as the chocolate can bloom (turn gray/white) when thawed.
FAQs
Final Throught
These Spider Chocolate Chip Cookies prove that a little creativity can go a long way in the kitchen. They are delicious, easy to make, and bring a fun, friendly fright to any gathering. Happy baking, and happy Halloween!
Slow Cooker Homemade Tomato Sauce: Rich, Easy, and Hands-Off
Course: Uncategorized8
servings10
minutes6
minutes90
kcalIngredients
2 1/4 cups all-purpose flour
1 tsp baking soda, 1 tsp salt
1 cup (2 sticks) softened butter
3/4 cup granulated sugar, 3/4 cup brown sugar
1 tbsp vanilla, 2 large eggs
1 1/2 cups semi-sweet chocolate chips (dough)
1 cup semi-sweet chocolate chips (topping)
1 tbsp coconut oil (optional)
36–40 candy eyeballs
Directions
- Make Dough: Cream butter and sugars. Add eggs and vanilla. Mix in dry ingredients, then fold in 1 1/2 cups chocolate chips. Chill dough for 30 min.
- Bake: Scoop dough onto parchment-lined sheets. Bake at 375
- F (190
- C) for 10−12 minutes. Cool completely.
- Melt Topping: Melt remaining chocolate chips and coconut oil until smooth. Transfer to a piping bag.
- Decorate: Pipe a small dollop for the spider’s body, press two candy eyeballs on top.
- Pipe Legs: Once the body slightly sets, pipe four small, curved legs extending from each side. Let set completely.
Notes
- Chill the dough for a thicker, chewier cookie.
- For a savory meal base, don’t forget your easy, rich Slow Cooker Homemade Tomato Sauce
for a hearty pasta dinner!